
퀘스트 5/7 - QT Layer 추가 및 빌드 따라해보기
이번에 무엇이든 물어보세요 문의 한것처럼 빌드에러가 발생되어 모든 환경을 클리어 해주고 성공하였습니다.
빌드 에러가 나셨던 분을은 같이 해보시면 될듯 합니다. (ubuntu160.04 virtual machine , core x 4 , ram 10GB 설정해주었습니다.)
먼저 repo init 실행을 해보니, 새로운 버전이 있다는 메세지가 아래와 같이 나옵니다.
그래서 아래 안내대로 복사하여 repo init을 수행하였습니다.
1) repo init을 수행 하지만 아래와 같은 메세지 발생
/openstlinux-20-02-19$ sudo repo init -u https://github.com/STMicroelectronics/oe-manifest.git -b refs/tags/openstlinux-20-02-19
repo: warning: Python 2 is no longer supported; Please upgrade to Python 3.6+.
... A new version of repo (2.5) is available.
... You should upgrade soon:
cp /home/dbuntu/MPU/Ecos/Distribution-Package/openstlinux-20-02-19/.repo/repo/repo /usr/bin/repo
If you want to change this, please re-run 'repo init' with --config-name
repo has been initialized in /home/dbuntu/MPU/Ecos/Distribution-Package/openstlinux-20-02-19
2) 위의 안내대로 repo를 업그레이드를 복사하여 수행
/openstlinux-20-02-19$ sudo cp /home/dbuntu/MPU/Ecos/Distribution-Package/openstlinux-20-02-19/.repo/repo/repo /usr/bin/repo
3) repo 업그레이드 이후 init을 설정
/openstlinux-20-02-19$ sudo repo init -u https://github.com/STMicroelectronics/oe-manifest.git -b refs/tags/openstlinux-20-02-19
4) Distribution 환경 설정
/openstlinux-20-02-19$ DISTRO=openstlinux-weston MACHINE=stm32mp1 source layers/meta-st/scripts/envsetup.sh
5) clean 실행
/openstlinux-20-02-19/build-openstlinuxweston-stm32mp1$ bitbake -c cleanall st-image-weston
6) bitbake 실행
/openstlinux-20-02-19/build-openstlinuxweston-stm32mp1$ bitbake st-image-weston
7) qt 환경 설정
/openstlinux-20-02-19$ DISTRO=openstlinux-eglfs MACHINE=stm32mp1 source layers/meta-st/scripts/envsetup.sh
8) clean 실행
/openstlinux-20-02-19/build-openstlinuxeglfs-stm32mp1$ bitbake -c cleanall st-example-image-qt
9) bitbake 실행
/openstlinux-20-02-19/build-openstlinuxeglfs-stm32mp1$ bitbake st-example-image-qt
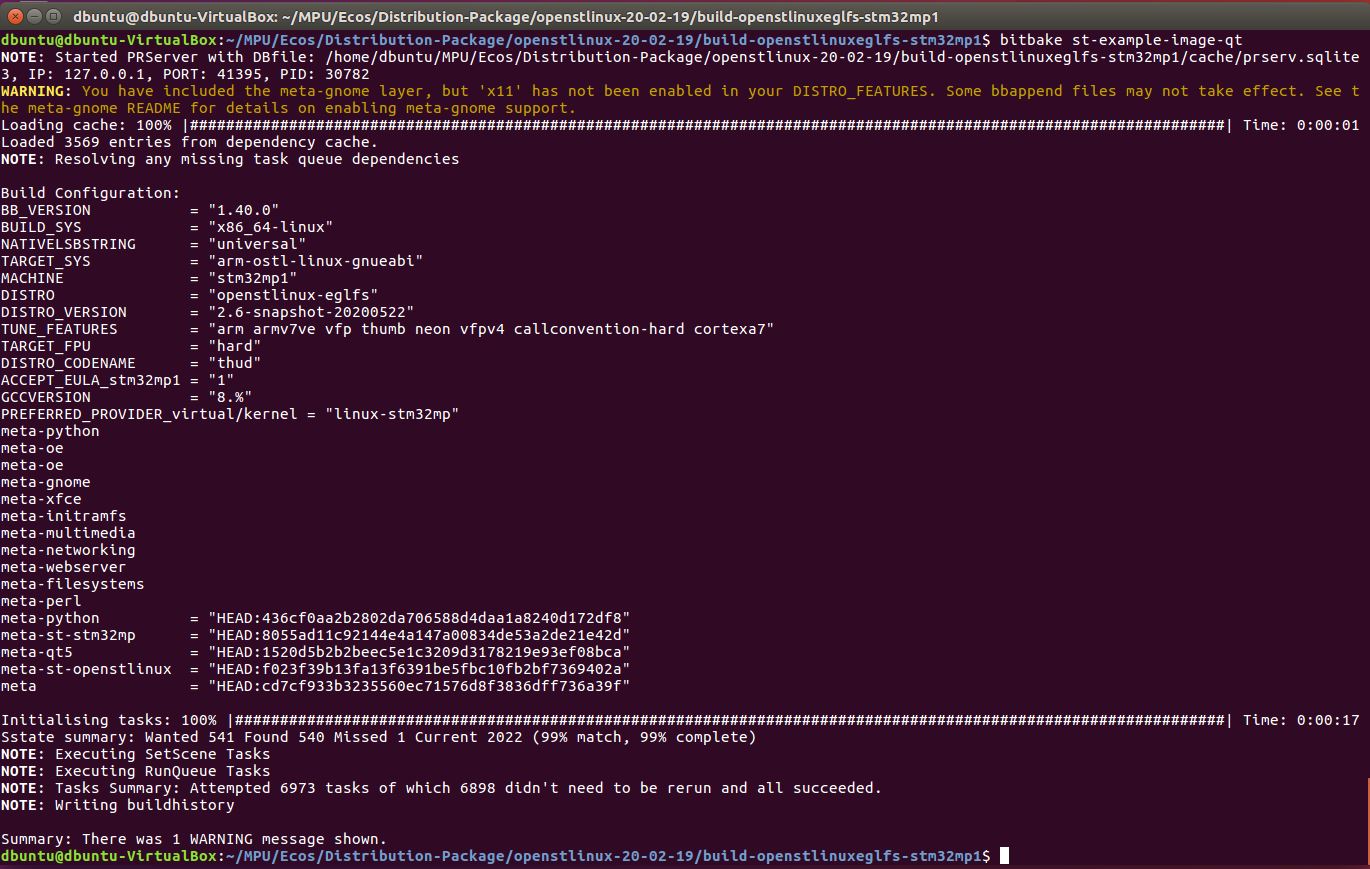
위와 같은 수행을 진행 후 정상적으로 qt버전의 bitbake가 진행되었습니다.
10) flashing 하기
/openstlinux-20-02-19/build-openstlinuxeglfs-stm32mp1/tmp-glibc/deploy/images/stm32mp1/flashlayout_st-example-image-qt
폴더안의 FlashLayout_sdcard_stm32mp157c-dk2-basic.tsv 파일다운로드 하였으며, tsv 파일변경 없이 잘 동작되는 것을 확인하였습니다.
- bitbake를 실행하여 성공한 결과 화면 제출
- Desktop에서 Hello world 예제 실행 화면 제출
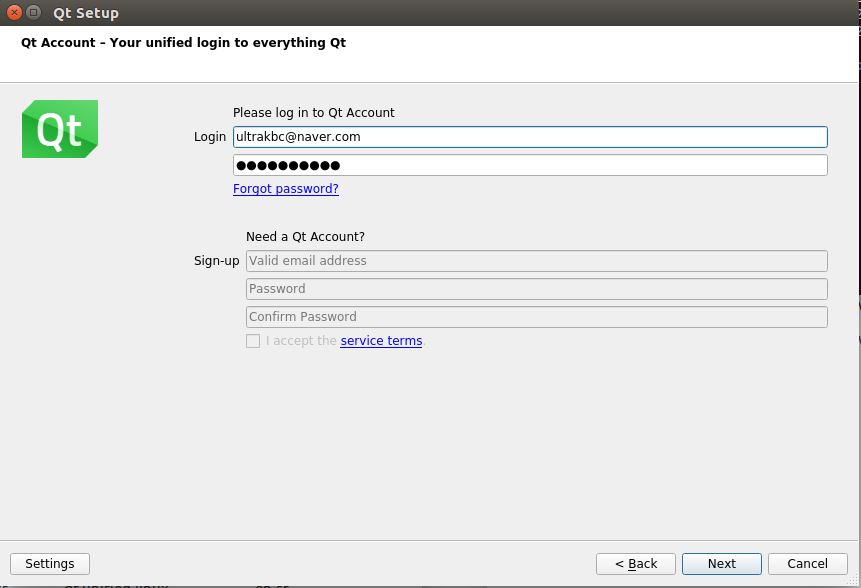
1) Qt 5.11.3 설치
메일로 수신된 Qt 계정을 사용하였습니다.
installer 를 다운 받아 실행 시키고 아래와 같이 계정 로그인을 통해 실행하였습니다.
인스톨시 주의사항
여기서 Archive 를 체크해주어야 QT5.11.3 을 선택할 수 있습니다. filter를 누루고 다운이 받아지면 back으로 돌아가서 QT5.11.3을 설치할 수 있었습니다.

설치 완료 후 주의 사항
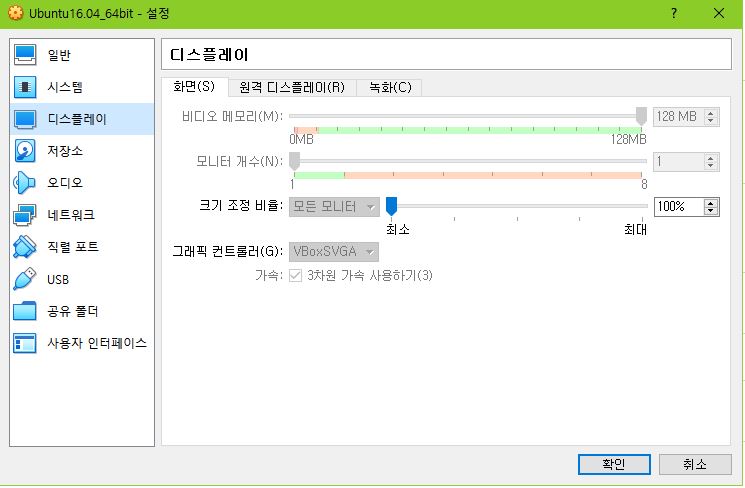
혹시 virtual box를 사용한다면 display 설정에서 바꿔주어야 합니다. VBoxSVGA로 설정해 qt creator 수행시 정상동작하였습니다.
이전 설정의 경우 creator를 수행하면 화면의 일부 가 보이지 않는 현상이 있었습니다.
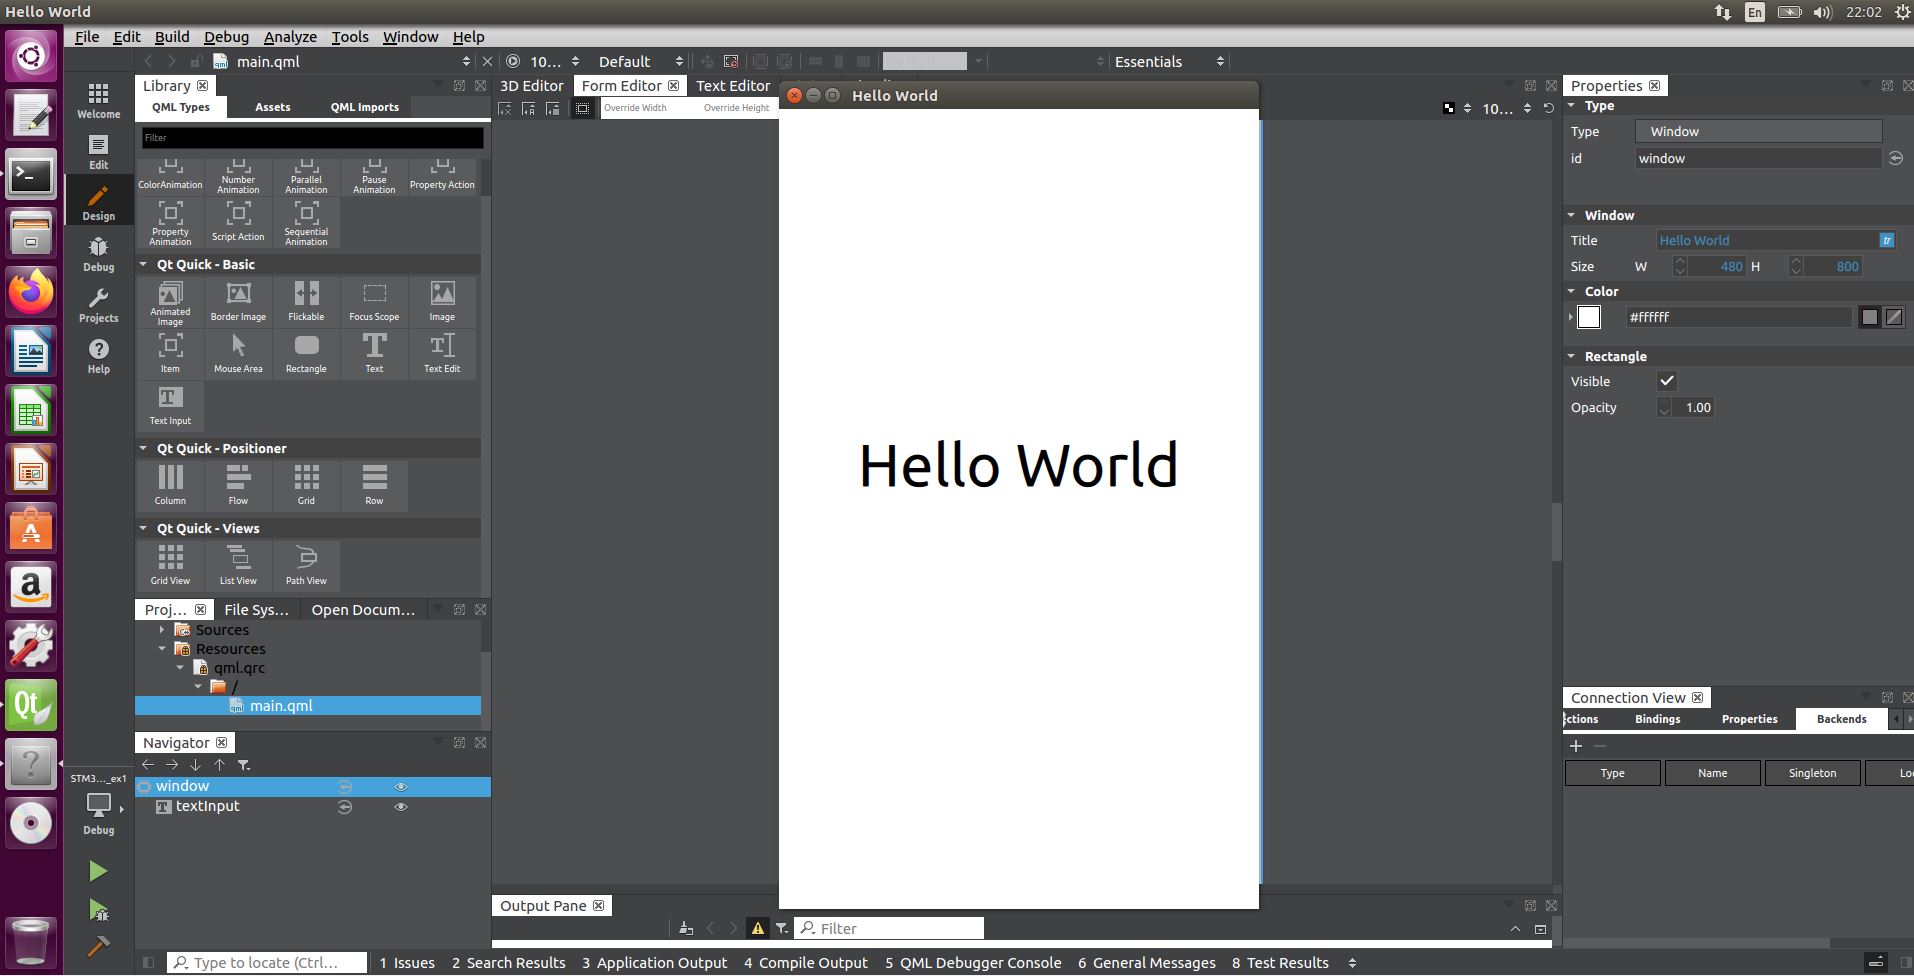
QT creator를 시행시키고 디자인에서 text input 콤포넌트를 사용해 hello world를 삽입해보았습니다.
- 보드 LCD에 출력된 Hello world 예제 실행 화면 제출
pc> devtool add q5testex q5testex/
pc> devtool build q5testex
bin 파일 위치
openstlinux-20-02-19/build-openstlinuxeglfs-stm32mp1/tmp-glibc/work/cortexa7t2hf-neon-vfpv4-ostl-linux-gnueabi/q5testex/1.0-r0/image/opt/q5testex/bin$
pc> scp q5testex root@192.168.7.1:/usr/bin
board> psplash-drm-quit
board> /usr/bin# ./q5testex
위와 같이 devtool을 통해 qtcreator로 생성된 파일을 빌드 하였습니다.
만들때 QT creator로 생성된 파일위치에서 실행해야 합니다.

- Hello World 예제 소스코드 제출
main.cpp
#include
#include
int main(int argc, char *argv[])
{
QCoreApplication::setAttribute(Qt::AA_EnableHighDpiScaling);
QGuiApplication app(argc, argv);
QQmlApplicationEngine engine;
const QUrl url(QStringLiteral("qrc:/main.qml"));
QObject::connect(&engine, &QQmlApplicationEngine::objectCreated,
&app, [url](QObject *obj, const QUrl &objUrl) {
if (!obj && url == objUrl)
QCoreApplication::exit(-1);
}, Qt::QueuedConnection);
engine.load(url);
return app.exec();
}
main.qml
import QtQuick 2.11
import QtQuick.Window 2.11
Window {
id: window
visible: true
width: 480
height: 800
title: qsTr("Hello World")
TextInput {
id: textInput
x: 58
y: 297
width: 364
height: 116
text: "Hello World"
scale: 1
verticalAlignment: Text.AlignVCenter
horizontalAlignment: Text.AlignHCenter
font.pixelSize: 60
}
}