수행기록퀘스트5
1. Qt가 포함 된 이미지 만들기
% 현재 추가되어있는 Layer 확인.
$ source ./layers/meta-st/scripts/envsetup.sh
$ bitbake-layers show-layers
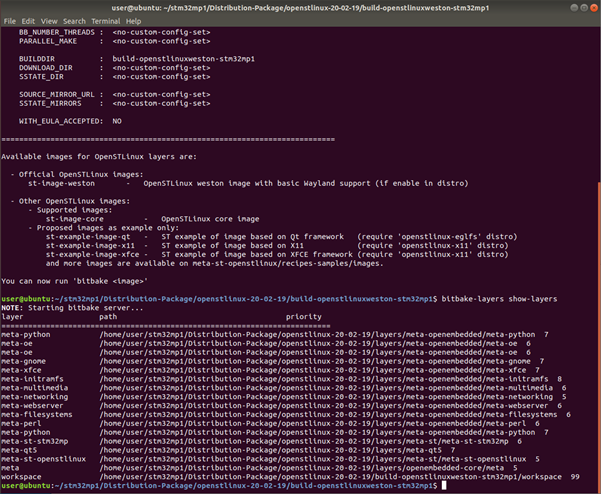
% Qt Framework base의 image 환경설정.
$ DISTRO=openstlinux-eglfs MACHINE=stm32mp1 source layers/meta-st/scripts/envsetup.sh

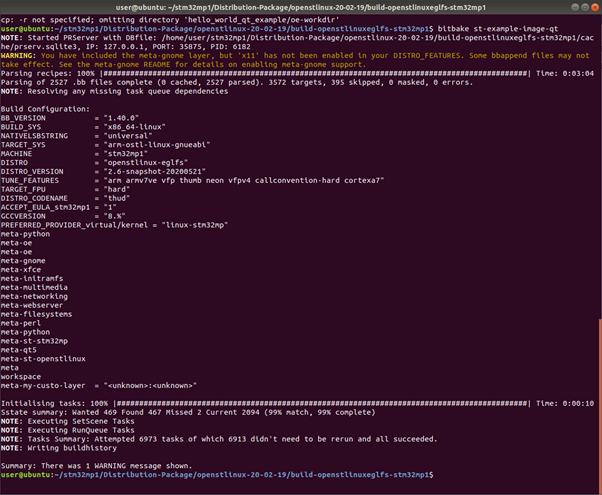
1. bitbake를 실행하여 성공한 결과 화면 제출
% download 속도와 생성중 발생하는 Error로 이 작업만 몇일 걸린듯 함.
% Qt Framework base의 image 생성.
$ bitbake st-example-image-qt
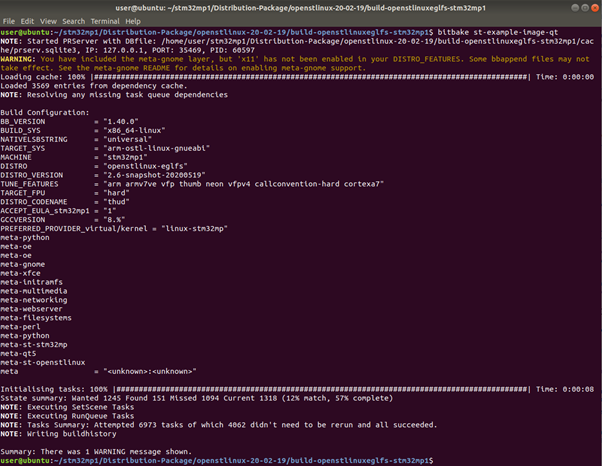
% 생성된 image를 DK2 board의 SD-Card에 저장.
% 자세한 방법은 Quest2 참조.
$ cd tmp-glibc/deploy/images/stm32mp1/
$ STM32_Programmer_CLI -c port=usb1 -w flashlayout_st-example-image-qt/FlashLayout_sdcard_stm32mp157c-dk2-trusted.tsv

% DK-2 board의 booting message 확인.
% ST OpenSTLinux – EGLfs 확인.

2. Desktop Qt 환경 설정하기
% Qt installer download (for Linux).
% Qt installer 실행.
$ ./qt-unified-linux-x64-3.2.2-online.run
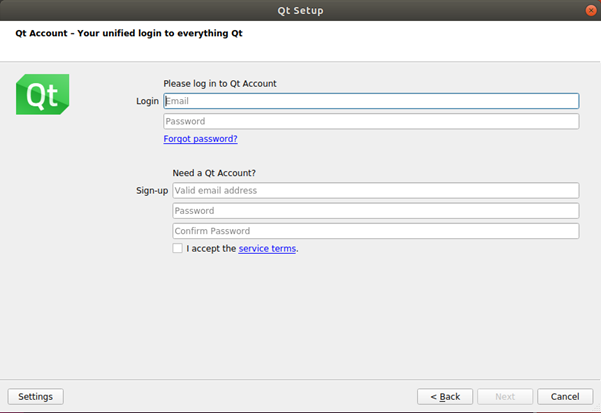
% 발급받은 계정 등록.
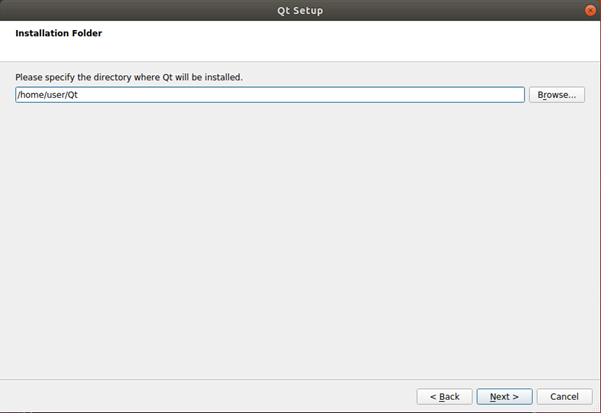
% Default Directory : /home/<계정이름>/Qt
% Qt package 선택. Qt Creator는 default 선택.
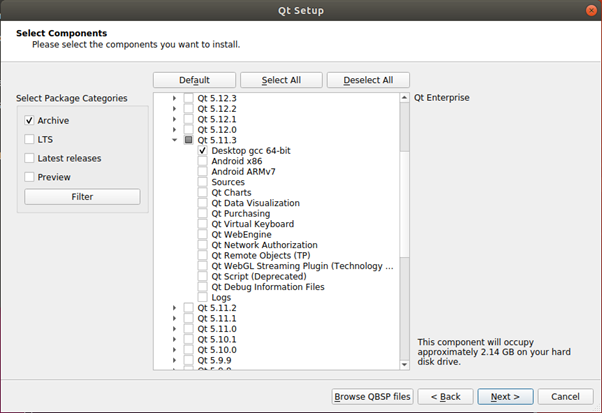
% Archive -> Filter Click. Qt -> Qt 5.11.3 -> Desktop gcc 64-bit 선택. Next를 눌러 설치.
% 설치가 완료되면 Qt Creator가 실행됨.
% 미리 발급받은 계정으로 로그인.

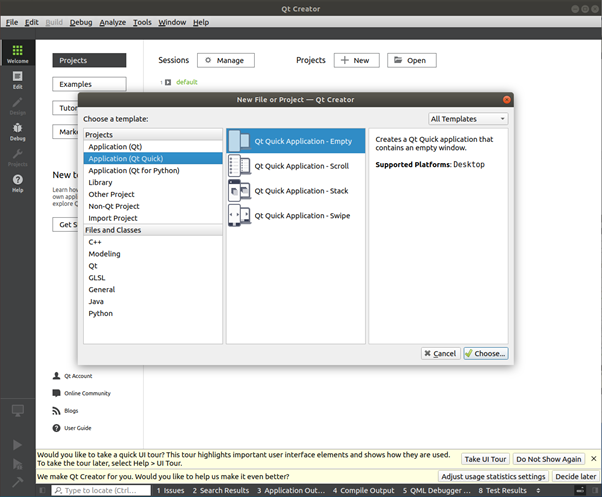
% Menu -> File -> New File or Project
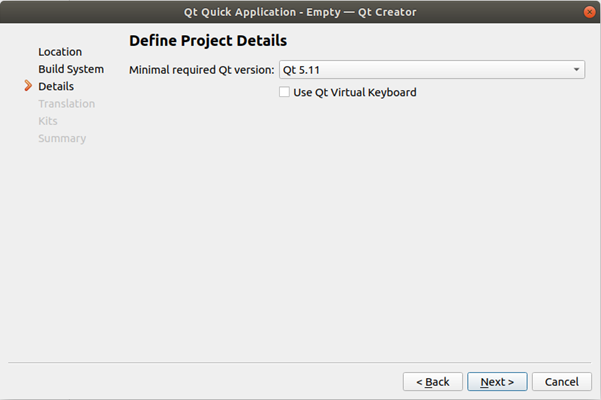
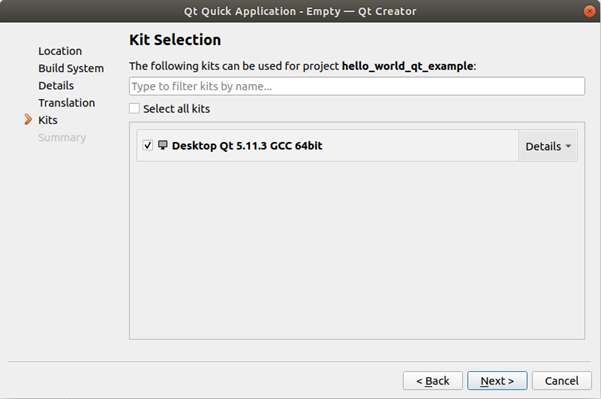
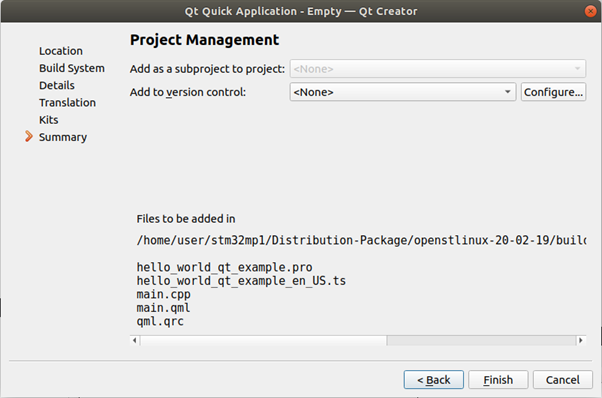
% Project -> Application (Qt Quick) -> Qt Quick Application - Empty
.png)
2. Desktop에서 Hello world 예제 실행 화면 제출
% DK2의 LCD 해상도는 480*800 이므로
% window의 width: 480, height: 800 설정
% Hello World text 추가

% Workspace에 추가하고, Target용으로 Build.
% 이 부분은 진행하지 않아도 되나 Qt build 확인용으로 진행. Layer 추가 후 확인가능.
$ devtool add myhelloworldqt hello_world_qt_example
$ devtool build myhelloworldqt
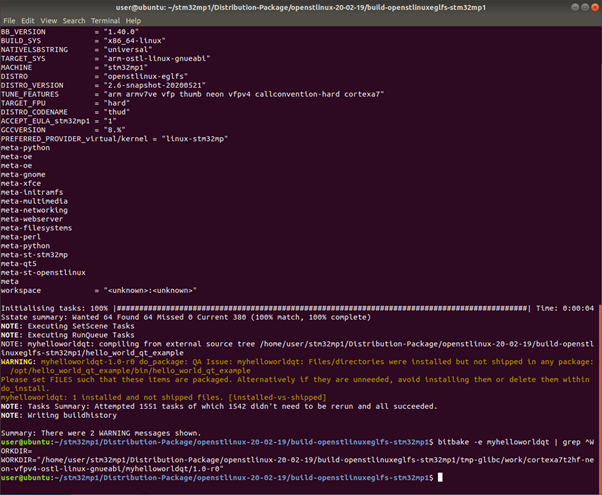
% WORKDIR Path 확인 및 Output file 확인.
$ bitbake -e myhelloworldqt | grep ^WORKDIR=
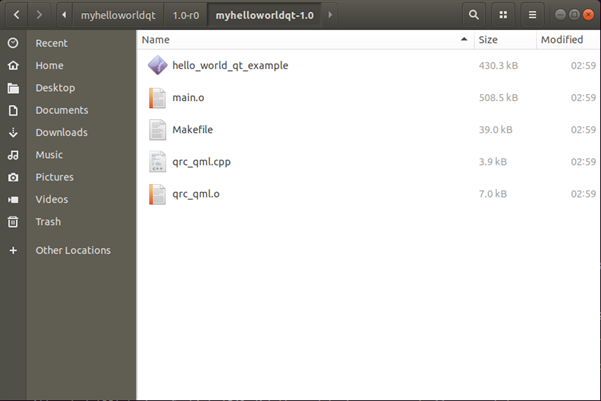
3. 개발 된 Application source를 빌드할 수 있도록 1 단계의 Yocto layer 에 recipe로 추가
% 참고 : https://wiki.st.com/stm32mpu/wiki/OpenEmbedded_-_devtool
% Layer 생성 및 확인. meta-my-custo-layer
$ bitbake-layers create-layer --priority 7 ../layers/meta-st/meta-my-custo-layer
$ cd ../layers/meta-st
$ tree meta-my-custo-layer

% 생성된 Layer 추가 및 확인.
$ bitbake-layers add-layer ../layers/meta-st/meta-my-custo-layer/
$ bitbake-layers show-layers

4. Application을 bitbake로 빌드
% 생성된 Layer에 기존 QTCreator로 제작된 Source Code 및 recipe 복사.
$ mkdir -p ../layers/meta-st/meta-my-custo-layer/recipes-custom/myhelloworldqt
$ cp workspace/recipes/myhelloworldqt/myhelloworldqt.bb ../layers/meta-st/meta-my-custo-layer/recipes-custom/myhelloworldqt/
$ mkdir ../layers/meta-st/meta-my-custo-layer/recipes-custom/myhelloworldqt/myhelloworldqt
$ cp hello_world_qt_example/* ../layers/meta-st/meta-my-custo-layer/recipes-custom/myhelloworldqt/myhelloworldqt
% 기존 QTCreate로 제작된 Source code와 Workspace에 추가된 reseipe 제거(추가된 Layer의 이름과 동일하여 제거 후 진행)
$ rm -r ./*hello_world_qt_example*
$ rm -r ./workspace/appends/
$ rm -r ./workspace/recipes/
% 생성한 Layer의 recipe 수정
~/stm32mp1/Distribution-Package/openstlinux-20-02-19/layers/meta-st/meta-my-custo-layer/recipes-custom/myhelloworldqt/myhelloworldqt.bb 추가
S = "${WORKDIR}"
FILES_${PN} += "opt/*"
SRC_URI = "file://hello_world_qt_example.pro \
file://hello_world_qt_example.pro.user \
file://hello_world_qt_example_en_US.ts \
file://main.cpp \
file://main.qml \
file://qml.qrc"
% 생성한 Layer Build
$ bitbake myhelloworldqt
@ 추가된 Layer가 포함된 image 생성
% 생성한 Layout을 image 제작 시 추가되도록 configuration file 수정.
~/stm32mp1/Distribution-Package/openstlinux-20-02-19/build-openstlinuxeglfs-stm32mp1/conf/local.conf
제거
INHERIT += "rm_work"
추가
IMAGE_INSTALL += "myhelloworldqt"
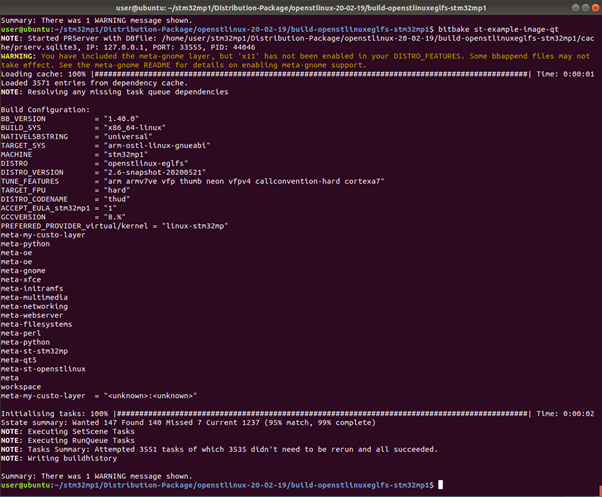
% 생성한 Layer의 이전에 생성된 Output file을 제거 후 image 제작.
$ bitbake -c cleanall myhelloworldqt
$ bitbake st-example-image-qt
5. 빌드 한 결과를 target에 copy
% WORKDIR의 /build로 이동 후 생성된 이미지 전송
$ scp hello_world_qt_example root@192.168.7.1:/usr/bin
6. QT Application Launching
% DRM/DRI Disable.
$ psplash-drm-quit
% QT 예제 실행.
$ ./hello_world_qt_example

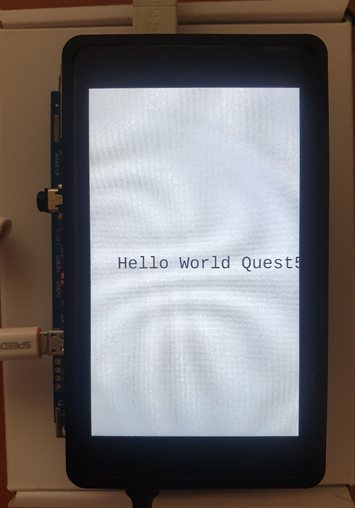
3. 보드 LCD에 출력된 Hello world 예제 실행 화면 제출
% Host와 Target의 Font 크기가 다른지.... 옆으로 넘어감.
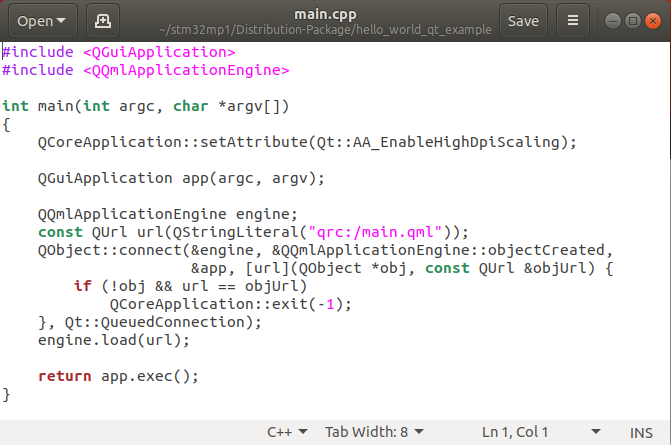
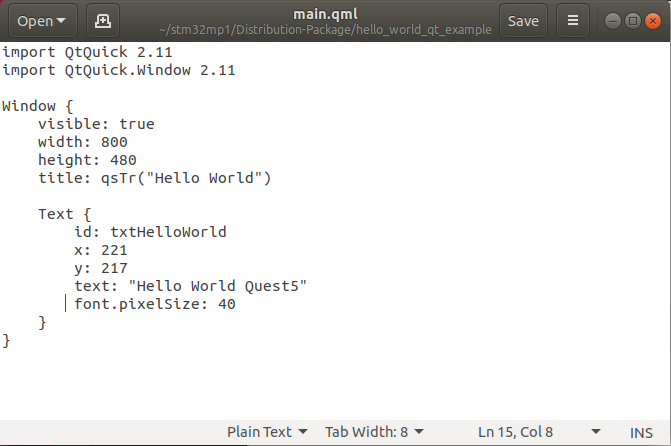
4. Hello World 예제 소스코드 제출
% main.cpp
% main.qml
로그인 후
참가 상태를 확인할 수 있습니다.

